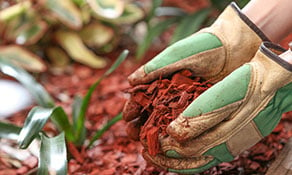
 Choosing colored mulch for your next project is a great way to add beauty to your landscape design while improving the health of your soil and plants. But you can’t just throw some mulch down and expect everything to be perfect. To get the best results, you need to take a little time to prepare your mulch beds properly. Here’s how to do it, plus some tips on how to take care of your mulch once it’s installed.
How to prepare mulch beds
1. Kill and remove weeds
This is an important step because just as mulch can help improve the health of your soil, it can also help weeds grow stronger if they’re not removed. So, make sure you pull up and remove any visible weeds prior to putting down your mulch. You can also use an herbicide (chemical weed-killer) or natural weed-killing methods (using newspaper, vinegar, etc.) to make the job easier. But if you do use a chemical herbicide, just be sure to do it at least two weeks before mulching so the weeds can die completely.2. Trim nearby trees and bushes
Trees and bushes are an essential part of many landscape designs. But they also drop seeds and create debris like sticks and leaves. Before you prepare your mulch beds, tackle the surrounding greenery and trim any trees or bushes that could create unwanted debris.
3. Rake your mulch bed
To prepare the soil of your mulch bed, use a rake to remove any organic material like leaves, seeds or sticks. This will also help get rid of any debris that was created when you trimmed your trees and bushes.
4. Cultivate the soil
Once the mulch beds are clean and tidy, it’s time to cultivate the soil. Use a hand-operated cultivator or a more powerful rototiller to turn over the soil. This will help strengthen the health of your mulch beds by allowing air and moisture to get into the soil more easily.
5. Edge your mulch bed
This is more about aesthetics than it is the health of your plants and soil. But using a shovel or power edger to create a clear, defined boundary for your mulch bed will really help your overall landscape design pop.
6. Smooth out your mulch bed
Another important step in making your landscaping look its best is to smooth out the soil in your mulch bed using a rake or some other garden tool. This will help prevent your mulch from looking lumpy or uneven once installed.
7. Treat your mulch bed
To help ensure all your hard work preparing your mulch bed doesn’t go to waste, use a pre-emergent to treat the desired area. Weeds can leave tiny seeds that may survive your first attempt to de-weed the mulch bed. A pre-emergent herbicide will stop those seeds from germinating, preventing weeds from growing beneath the mulch surface and stealing precious nutrients from your soil.
8. Start mulching!
Once you’ve completed all of these steps, you’re finally ready to start mulching. To figure out how much mulch you'll need, multiply your total area (in feet) by how deep you want your mulch (in inches). For example, if your square footage is 648 and you want a 2-inch depth, multiply 648 by 2 to get 1296 (648 x 2 = 1296). Then divide your answer by 324 (1 cubic yard of mulch will cover 324 square feet with 1 inch of mulch) to figure out how many cubic yards of mulch to order. The formula is as follows: total square footage x desired depth (inches) ÷ 324 = total cubic yards needed.

When you're ready to mulch, lay down a roughly 2-inch layer of mulch across the entire mulch bed, using a rake to make sure everything is spread evenly. If your mulch bed sits up against any trees or other woody plants, just be sure to keep the mulch from getting too close to the base of the plant. Spray your colored mulch with water to help everything settle, then sit back and enjoy a job well done.
Mulch maintenance tips
As the season progresses, you’ll need to perform some routine maintenance to make sure your mulch continues to look its best. About once a month, check your mulch for compaction and use a hand-operated cultivator or rake to loosen the mulch if it gets too compacted. Remove any weeds that manage to grow through the mulch layers.
Mold and fungus can sometimes be a problem. Remove any fungus you find, as well as the mulch in the immediate surrounding area. If you’re using mulch colored with Amerimulch colorants and specially formulated Plus additive, this shouldn’t be an issue as our unique additive contains fungicides to reduce the occurrence and growth rate of mold and fungus.
If your mulch beds start to thin, just add mulch until you reach the desired depth. By performing these basic tasks, you can keep your mulch fresh and your landscape looking great all year round.
For more information on ChromaScape’s range of Amerimulch mulch colorants and equipment, contact us or request a sample today.


